Showing posts with label Jen. Show all posts

Sunday, January 5, 2014

Winter CandyLand 1st Birthday Party!

My little Christmas Present turned 1 this past December.  When searching for a theme I searched Pinterest for a few days.  I was originally going to go with the Winter ONEderland theme, but it seemed that it was quite the popular theme.  Wanting to be a little different I came across the Winter CandyLand theme and LOVED it.  What's better than candy, cookies and sweets!?

I purposely scheduled the party at a 'non-eating' time so I didn't have to throw serving a meal on top of everything else I was doing.  I did everything, but baking the cake, and the cake pops myself.

One of my favorite items from the party was the sucker tree. The kids (and adults!) LOVED it.  I got the candle holder from Hobby Lobby (8.99 on sale), and I used a 6" styrofoam ball and cut one end off so it sit flat on the candle holder. From there I filled it with Dum-Dum suckers.  It took A LOT of suckers to fill this thing.  But, it's still in the kitchen, I keep refilling it. It's such a colorful cute decoration.

The cookies. I was VERY specific on the cookie cutters I wanted. I searched multiple stores (and had my in-laws looking) for a wrapped candy shaped cookie cutter. I FINALLY found it at Joanne Fabrics.  The cookies themselves I just used Pillsbury sugar cookie dough out of the tube. I know, I know..cheater. But I put a lot of time and effort into decorating that I really didn't want to put that much effort into baking. I made a lot of cookies, so I used two of the large tubes. I honestly don't even know if they sell them when it's not Christmas time.  For the icing/glaze I mixed powdered sugar and a tiny bit of milk until I got the consistency I wanted.  I then added the coloring gel (Wilton brand that comes in a little jar..around $1.75/color at Walmart) and transferred it to the piping bags.  They do sell white coloring as well, which I did use. I believe I got that at Joanne's too.  Not going to lie. I was decorating for around 4 hours. I got about two and a hlaf episodes of the Following (on Netflix) into it and was asking myself what was I thinking!?  I have to say the time and effort were worth it though. Those snowmen rocked.

The cake. Oh this cake was specific.  I thought it was going to be super easy. White round cake, red polka dots and red trim. I mean, how hard? Right? Apparently it was very confusing for the poor girl at Sam's Club.  Twenty minutes later I felt moderately sure that she understood what I wanted.  I was greatly relieved when I picked it up and it was perfect.  All I had to do when I got home was add the cookies and suckers (got those at Party City).


Now for the candy. Oh..lots and lots of candy.  We had Dum-Dums obviously, Starbursts, M&M's, blue and red Sixlets (color specific from Meijer 2/$5), Hershey's Kisses (chocolate and candy cane flavor), red candy coated marshmellows on a stick, Sourpatch kids, and Candy Canes.  I got these cute red and blue scoops from Party City as well.  The candy was used as the goodie bag.  I bought red and blue small gift bags and red and blue tissue paper. Each bag had the opposite color tissue paper, and before the kids left they got to pick out some candy and cookies to take home.  The parents loved that idea. 

All in all it turned out just as I had planned. The kids LOVED it. I'm still the favorite aunt..my niece wants to have a Candy Land birthday party for her next birthday.  

And here's the happy Birthday Boy!  

Pin It

Sunday, June 16, 2013

#longlashes fail

I was so so excited to do the #longlashes influenster. I put the serum on every night before bed...that is until last night. I heard Moose upstairs in the bathroom,  so I went up to investigate.  I find him with my tube of Fysiko open & he was running around. I managed to stop him and snatch it away.   I went to put the brush back and I noticed it sounded quite liquidy.  After some investigation I realised that he had submerged the open tube in the toilet.

Needless to say, this influenster is over for me. I'm so bummed. :(

Pin It

Thursday, May 9, 2013

Fysiko Lashes

Now, this post isn't going to be like the other posts on this blog.  I had signed up for this program called Influenster a few months ago.  I had gotten a survey about my eyelashes, so I filled it out and a week or two later I got another email that said I was chosen to receive a new product that increased the length and thickness in your eyelashes in as little as 2 weeks.  

Now, if you know me in real life, you'd know that my kids, especially my oldest has the LONGEST lashes ever. I'm not kidding! When he went and got his glasses fitted they couldn't make them as tight as they needed to be because his lashes would have hit the lenses!  So, I'm always asking him if I can have his eyelashes. He always tells me no. :(

Well, thanks to a product called Fysiko Lashes I can grow my own long lashes!  I just got the product in the mail today, I have to apply it to my upper eyelid like a liquid eyeliner every night. Best results are at 16 wks.  So, naturally I rushed and took off my makeup tonight and applied the product as instructed. 
Here's what the brush looks like

I am super excited to see the results and share them with you! 

Here is my 'before' picture

*I was given this product free of charge, and not paid in anyway to test/review it


Pin It

Sunday, March 10, 2013

Protein Energy Balls

Lately I've been on a health kick.  I started doing Insanity 2 weeks ago, and we are focusing more on eating clean.  Here's the problem: I am a chocolate addict.  Seriously people. It's bad.  I can honestly say that I don't really feel guilty when I inhale half a bag of Hershey Kisses while watching a movie.  But, alas, I knew there was a healthier way.

Now, I have a whole board dedicated to eating clean.  Most of the recipes I've tried, and honestly aren't too bad, some are actually REALLY good.  This one falls into the REALLY good category. 
Here is the original Pin


My favorite snack ever! These things are amazing!! So healthy!! No-Bake Energy Bites 1 cup (dry) oatmeal 1/2 cup chocolate chips 1/2 cup peanut butter 1/2 cup ground flaxseed 1/3 cup honey 1 tsp. vanilla

Looks pretty tasty right?  I looked up the ingredients list and I had all but one thing, which could be omitted if I wanted to.  Score!  So I got out my mixing bowl and the ingredients and got to work. 

Ingredients:
1c Oats
1/2c Peanut butter (I used all natural)
1/2c chocolate chips (I used the mini chips)
1/3c Honey (I used clear Agave Nectar, and not 1/3c of it..I would say half that)
1/2c Flax Seed
1tsp vanilla extract

Mix all ingredients together, let chill in refrigerator for 30m
Roll into 1" balls, return to the refrigerator


Easy peasy lemon greesy, as my 6 year old would say!  These are super fast to make and SUPER yummy!  They taste like a no bake cookie.  They're great when I'm craving sweets!  And I won't feel guilty.

So, people-if you're clean eating or not-try these! You won't feel guilty for eating them, or letting your kids eat them. Pin It

How to Remove Crayon From Fabric

I have neglected the blog. I can admit it. BUT in my absence I have given birth to our fourth (yes...FOURTH!) child, so I have been busy. Back to the reason for this post.  My three older children's birthday's were last month.  Seeing how the need new toys like Taylor Swift needs another ex-boyfriend we got them mainly clothes.  I had found this super cute yellow striped cardigan & teal jeggings from The Children's Place and gotten them for Miss Fluffy. 

The day the box with the clothes arrived, I put them on her. Of course she looks adorbs.  AND because these are brand new clothes I'm super anal about her not staining them.  Family of 6 + 1 income = not a lot of extra money to replace clothes.  So, she made it through lunch, dinner, snacks... no stains! Awesome! I call her to the living room to get her jammers on before bed and what do I see??  Magenta crayon on the thighs of those brand new teal jeggings.  Yes...MAGENTA! Oh I was mad.  This happened early February and she's STILL grounded from crayons.  She's four people-she knows better.  Anyway. I, of course, went to Pinterest to figure out how to remove the crayon from the fabric.  I've heard of a few different ways, but the most common on was to sandwich the fabric in between paper towel and crank up the iron.  Supposedly the heat from the iron would transfer the crayon wax onto the paper towel. Viola- no more crayon stain. 

I don't think I actually re-pinned this one because it was so self explanatory that if it worked I wouldn't need to go and look back on it, I would just remember.  Well, guess what? Didn't work.  But I did burn the ever loving crap out of my forearm on the iron while reaching for something in the cabinet.  Here's my lovely scar. wahh! It does look a little like a sluggy alien with it's mouth open though..


File this one under bust ladies and gentleman.  Tried it. Burnt my arm. Didn't work.
Update: I was able to get the crayon out with a good saturation of Clorox 2 stain remover spray.
Pin It

Saturday, December 1, 2012

North Pole Breakfast

It's that time of year again...December 1st...and our Elf on the Shelf 'Elfie' has arrived! Yes, my kids got super creative with the name. My husbands in the Navy and will pretty much be out to sea this whole month..but I will NOT let that ruin the kids Christmas and all the magic that entails-enter The North Pole Breakfast.  I found this Pin while looking for Elf on the Shelf ideas and LOVED it. 
Here is the original PIN
North Pole Breakfast, love this idea.

How fun right!? 

Okay, first I'm going to go through a run down of everything I got for this little event.  I went into this thinking it was going to be pricey.  Thank God for Dollar Tree & Walgreens Rewards coupons!

--From Dollar Tree I got: Elf hats, socks, candy canes, candy cane straws, serving platters/bowls, snowflakes and the coffee mugs: around $17
--From Walgreens: coloring books, activity pads, note pads and ornaments: $2 after rewards
--From Target: plates and placemats: $12

Alrighty.  I am exhausted. I was up until 1:30am last night/this morning setting this thing up.  I then had to set my alarm for 6:45 to wake up before my daughter (the early riser) so I could finish setting up. 

The spread:

Just a glimpse at the table..
 
 
Nummy cinnamon rolls with red & green sprinkles
 
Peppermint Kisses (me & Moosey's favorite!)
 
North Pole Milk (green food coloring & peppermint extract milk)
 
Winter Oreos
 
Snow covered donut kabobs
 
 Fluffy's plate-she ate her donuts and the good half of her Oreo
 
 Ky's plate- he ate his donuts & Kiss
 

 The main Elf man himself...Elfie!


Just some randoms of the set up: 


Pretty snow flakes 
 
 Ornaments
 
 Ky in his Elf hat
 
 Miss Fluffy in hers
 
 Socks (Moose wasn't awake yet, but his are the same as Ky's reindeer ones)
 
 Coloring & activity books
 
 He's awake!
 
 Yum! North Pole Milk!!
 
 Ky loves his little bro!
 
 
It was totally worth the long night last night and early morning.  The kids had a blasty, I retained my title of Buddy the Elf (of our house anyway).  Kyin was so happy he wrote a note to Elfie it said "L-fe (Elfie) I <3 you" Except he wrote the heart the normal way of course :)
 
Happy December y'all!
 
Pin It

Saturday, November 17, 2012

Have Your Pic Drawn As A Disney Character

Now, this post isn't food or DIY it's a..well...review, I guess. With 3, soon to be 4 kids my husband and I (well, I'm in charge if it all, so I) are doing Christmas on the cheap this year. I'm sure there are plenty of families across the country feeling the economical pinch this year. I'm planning on doing as much DIY for gifts for my kids as I can.

With that being said, when I came across a Pin that is about sending in a picture and having it turned into a Disney Princess I was intrigued! I have an almost 4 year old daughter who is obsessed with anything Princess or Lalaloopsy. So this was right up my alley. I clicked on it to see what it was about and pricing. I assumed it would be semi pricey, given it's custom work, but I thought, why not check it out. I am SO glad I did! The Pin brought me to Fiverr.com.

If you've never heard of Fiverr.com it's a website that people can post "I will do (insert whatever here) for $5" Everything's $5. Now, some stuff is out there. I seen one where a girl will paint her toe nails in any shade you want and take a picture of it. I do not want to know what that's about. But, there are some really cool ones on there..like the custom Princess images!

Here is the original PIN
 Have your pic drawn like a Disney character - $15 for color or only $5 for b/w.  really cute idea - to frame in a girl's room or for me because I love Disney! And what girl doesn't want to be a Disney princess?!

Pretty freaking cool right!?  Well, I was saddened to see that the person who did this one wasn't offering this deal anymore.  BUT there were a few others who were doing this as well.  So, I bit the bullet and found one I liked and sent my daughters picture in and purchased it.  After I did that I was so excited for her to get this custom Princess drawing of herself I figured there HAD to be someone who does this but with boy centered things. 

So I searched Super Heros, there were a few hits, but they were kinda 'ehh'  Then I seen it. Custom Lego Man image!  My oldest son is ALL ABOUT Legos. Seriously. I even took him to the Lego Discovery Center outside of Chicago this past summer and he didn't want to leave.  Anywho.  I jumped on it and purchased a custom Lego image of my son.  It came today and I am so thrilled with it, I can't wait to give it to him for Christmas! 

Here is my son, Kyin & then the Lego Kyin


Now, obviously, it's a Lego man so there isn't all that much detail that actually goes into it. But it's got his glasses and his faux hawk. :)  The link to the person who made this is right HERE

And onto the Princess drawing!  I literally just received this about an hour ago, I had to wait to post this blog post until I got it. Just like the Lego drawing, you send in a picture for reference, but you also get to specify style and colors.  I chose classic Disney Princess and pinks/purples.

So here's the pic of my daughter I sent in and the Princess drawing:


I absolutely LOVE it, and I know she will too!  HERE is the link to the listing if you're interested in getting a Princess drawn of you're little lady! Pin It

Sunday, November 4, 2012

Garden Tomato Sauce

I love pasta. Love.  If one day I had to cut carbs out of my diet, I would be a wreak..a healthy portion of my favorite dishes are pasta dishes.  You would think that if I love pasta so much that I would have a good red sauce recipe, right? Well, that wasn't the case-until today.

So, I pinned the garden tomato sauce recipe pin a while ago, mainly because the picture made it look oh so tasty.  Now, seeing how it's November I had to use store bought tomatoes.  Even if it was gardening season, I live in military housing with a tiny backyard that gets NO sun. None.  There was a family that lived across the court yard that grew corn in their back yard our first summer here. I hated them. They got the stink eye every time I went in my super shaded can't even grow grass back yard. Okay, enough about the crap hand of a backyard we were dealt.  This recipe would be even better if I did have a garden though..because I wouldn't have had to buy ANYTHING for it.

Here is the original Pin
Garden Tomato Sauce over Pasta from Southern Living. Made with fresh tomatoes from garden :) Garlic, onions, salt, pepper, olive oil, and red wine. You can even freeze it if you have tomatoes coming out the wazoo!
See!? Yum Yum!!

Now, I altered the recipe some, not much..but some.

Here is the original recipe from myrecipes.com

Ingredients:
1 onion diced
tablespoon olive oil
1 garlic clove, minced
4 medium size heirloom tomatoes (about 2lbs) cored and chopped
Kosher salt
Fresh ground pepper
1/4 cup red wine
3 tablespoons chopped fresh oregano or marjoram Hot cooked pasta
Garnish: fresh oregano leaves
Now. I don't have red wine. I don't drink it, I don't regularly use it to cook with, so I substituted chicken stock.  I think this is a great recipe to use as a starting place for someone to make their own.  We eat clean (mainly, we do cheat sometimes) so if I can make my own anything, I'm going to attempt it!

Here are my ingredients that I used-
1 onion diced
1 tpsp olive oil
1 clove garlic, minced
3 1/2 off the vine tomatoes (they didn't have heirloom at Food Lion when I went, and these suckers were on sale, and fairly large, about the size of beef steak tomatoes), diced
Sea Salt
Pepper
1/4c Chicken stock
1 1/2 tsp Tomato paste
Pinch sugar
Dried oregano, marjoram, and Italian seasoning
Cayenne Pepper
Cooked Pasta
Shredded Mozzarella

Now. The original recipe says to use a dutch oven. I don't have one. BUT I do have my super awesome deep oval shaped Rachel Ray pan.  NOTHING sticks to this beast so it's my go to when dealing with tomatoes/tomato sauce recipes.

Heat oil in pan, and add your onions, let them cook for around 3 or so minutes-basically until they're soft.  Throw in the garlic and stir it up, let that cook for about another minute or so.  Then add your diced tomatoes and mix it all up.  Let that cook until the juices start coming out of the tomatoes.  Around this time the original recipe said to add your pepper and salt to taste, but I don't like adding seasoning until the end, so I'll know what the finished product will taste like, but feel free to season with salt and pepper to taste now if you'd like.  Once the tomatoes start releasing the juices add your chicken stock (or red wine) and stir in the tomato paste.  Let that simmer and thicken up a bit ( it shouldn't take too long).  Now add your pinch or two of sugar, and your seasonings to taste.  Feel free to omit the cayenne, I like my sauce to have a little bit of a bite to it.  Once you have it tasting delicious I let mine simmer on low until my noodles were done.  The mozzarella isn't really needed. but my kids like a sprinkle of cheese on their pasta, and a sprinkle of mozzarella never hurts anything in my opinion. 

Please excuse the poor lighting in my kitchen.
Pin It

Tuesday, October 23, 2012

Stuffed Cheese Buns..a love story..

Yes, that's right people a love story. These rolls, buns, whatever you want to call them are that good.

Magnificent even.

Tonight is duty night in the Christopher household. What that means for dinner is that it's normally easy peasy night.  Tonight was pasta. Not a fancy pasta, just boiled ruffle noodles and a jar of sauce.  So, because dinner was going to take all of 30 seconds to prepare I thought I'd make some sort of bread to go with it, and I knew just what bread to make. I have been drooling over the image of these cheesy buns ever since I pinned them. Seriously.

Here is the original Pin and the drool worthy picture..

Stuffed Cheese buns
Image credit: myfridgefood.com

I mean really. What is not to love about that image!?  So I set off to my cabinets to make sure I have all of the paraphernalia to make these delicious lumps of cheesy goodness. Jackpot. It's all there.  I read over the directions..super easy, laid out to where you should have no problem producing the garlicy dough.  Now, I'm not including step by step instructions/pictures because it really is that easy.  I did do a couple things different though.  I didn't have chunks of mozzarella (directions call for a 3/4" chunk of mozz) all I had was shredded mozzarella, but it didn't pose a problem.  I just pinch a chunk of it and worked it in there.  The recipe also said that she used shredded cheddar jack an swiss for the cheese on top, I used fresh shredded Parmesan and mozzarella.  I also sprinkled some garlic salt on the rolls before putting the cheese on top.

So you should get 20 rolls, hopefully they'll last you at least a day. My kids LOVED them as much as I did. My oldest had maybe 3, my daughter had close to 3 as well-but after taking her first bite she told me I was the best cooker ever! Oh yeah, that's right. I got the 3 year old's seal of approval.  

Really people. Make these rolls. Unless you're lactose or gluten intolerant-then don't, but know, I fell bad that you can't enjoy these bites of cheesy heaven.

And here are what my rolls looked like.  Just because sometimes you can't trust the pin picture. :)
Pin It

Home Organizer Binder

Pinterest is a great place to make you feel like your home is in shambles. I don't know about you, but I go on there and see all of these organizing tips and tricks and feel like I am an unorganized hoarder. So, I took it upon myself to make a 'home organizer binder'. I don't know if it was a moment if clarity or a mad craze of nesting (#4 is due in less than 10 wks!).

So, this Pinterest project isn't directed at just 1 pin, but a multitude of pins. I actually have an entire board directed towards "getting organized". Here is the link to that board, with a majority of the printouts I used pinned on there.

My main reason for making this binder is because my in-laws will be with my kids while I'm in the hospital giving birth. I liked the idea of having everything in one spot: phone numbers, medical release forms, weekly overview, days of the week in depth, calendars, menu plan for the week/grocery list, daily cleaning schedule, folders for everyone's papers (mainly for Kyin's homework), my coupons, and I added a section for planning out Christmas.

I've been using this organizer for about 2 weeks now (and I think my printer has just now recovered from its over use!) and I have to say...it's has actually changed my daily schedule. It has made me hold myself accountable to my daily cleaning, and it's nice to have my schedule right in front of me!

All in all, if you're not anal and you need a little oomph to get organized and get stuff done, this is the way to do it. I honestly recommend it. Really. I'll end this post with a few pictures if my family binder.


Pin It

Wednesday, September 19, 2012

DIY Mentholated Shower Discs

Everyone in my house is sick. Literally everyone. The hubs seems to have gotten the sickest though (is he actually sicker...or is it just because he's a man? No, he really is sicker, damn flu shot gets him every time). So, thankfully I had previously Pinned the shower Discs! I set off to make these little mint lovelies .
Here is the original Pin


The directions say to use 1c baking soda 1/3c water and a mix of essential oils. Now, I'm not one to have random oils on hand-BUT I did have some Vicks type oil for a steam humidifier. I figured that it would work just the same.

So, I mix up the baking soda/water and make a paste, dump that into the lined muffin tin and baked for 20m at 350. When they were done and cooled I added the oil. The directions don't give an exact amount so I added about a 1/4 tsp- i didn't want my hubs to burn up in the shower.
He tried one last night, said it worked really well at first, but then lost its scent. So I added some more oil to the remaining discs.

All in all, this is a great DIY. Cheap, and it works. You should get around 6 or so discs per batch. Pin It

Tuesday, September 11, 2012

Magic Blackhead Remover?

Hey everyone, Jen here! So my older two are in bed, hubs is watching soccer...why not cruise Pinterest for some inspiration right?? So, as I'm checking out my peeps recent Pins I came across a blackhead remover. Sweet! I'm pregnant and get horrid blackheads when I'm preggo. So seeing how it only needed 3 things that I had, I figured I'd give it a shot.
Here is the original Pin
Getting rid of Blackheads: Take gel facial wash and mix with a tbsp of baking soda & a tbsp of salt. Apply to damp skin with cotton pad; leave for 5 mins. SO GROSS!
It says "Getting rid of Blackheads: Take gel facial wash and mix with a tbsp of baking soda & a tbsp of salt. Apply to damp skin with cotton pad; leave for 5 mins. SO GROSS!"

Sounds good! So, I check out the website linked to the Pin, because lets face it, the description didn't give all that much info. Well, website is in Russian. I tried to translate it with Google Chrome, but the pin wasn't on the first page, and there was no search option to figure out where it was as, so I gave up.  I figured I'd mix enough face wash with the salt and baking soda until it made a paste. 
So I get my paste all ready to go and start applying. My 19m old thought I looked crazy-I could tell by the way he stared at my face. I put it on my chin and nose, let it set for the recommended 5m and used a wet towel to remove it. 

Results: No difference in amount or look of blackheads :( Now I just have burning skin. I burns bad! I'm worried I'll have chemical peel looking skin for my ultrasound tomorrow. Eek!

So ya'll, take it from me-don't do it! Pin It

Wednesday, September 5, 2012

Make Your Own Chocolate Syrup

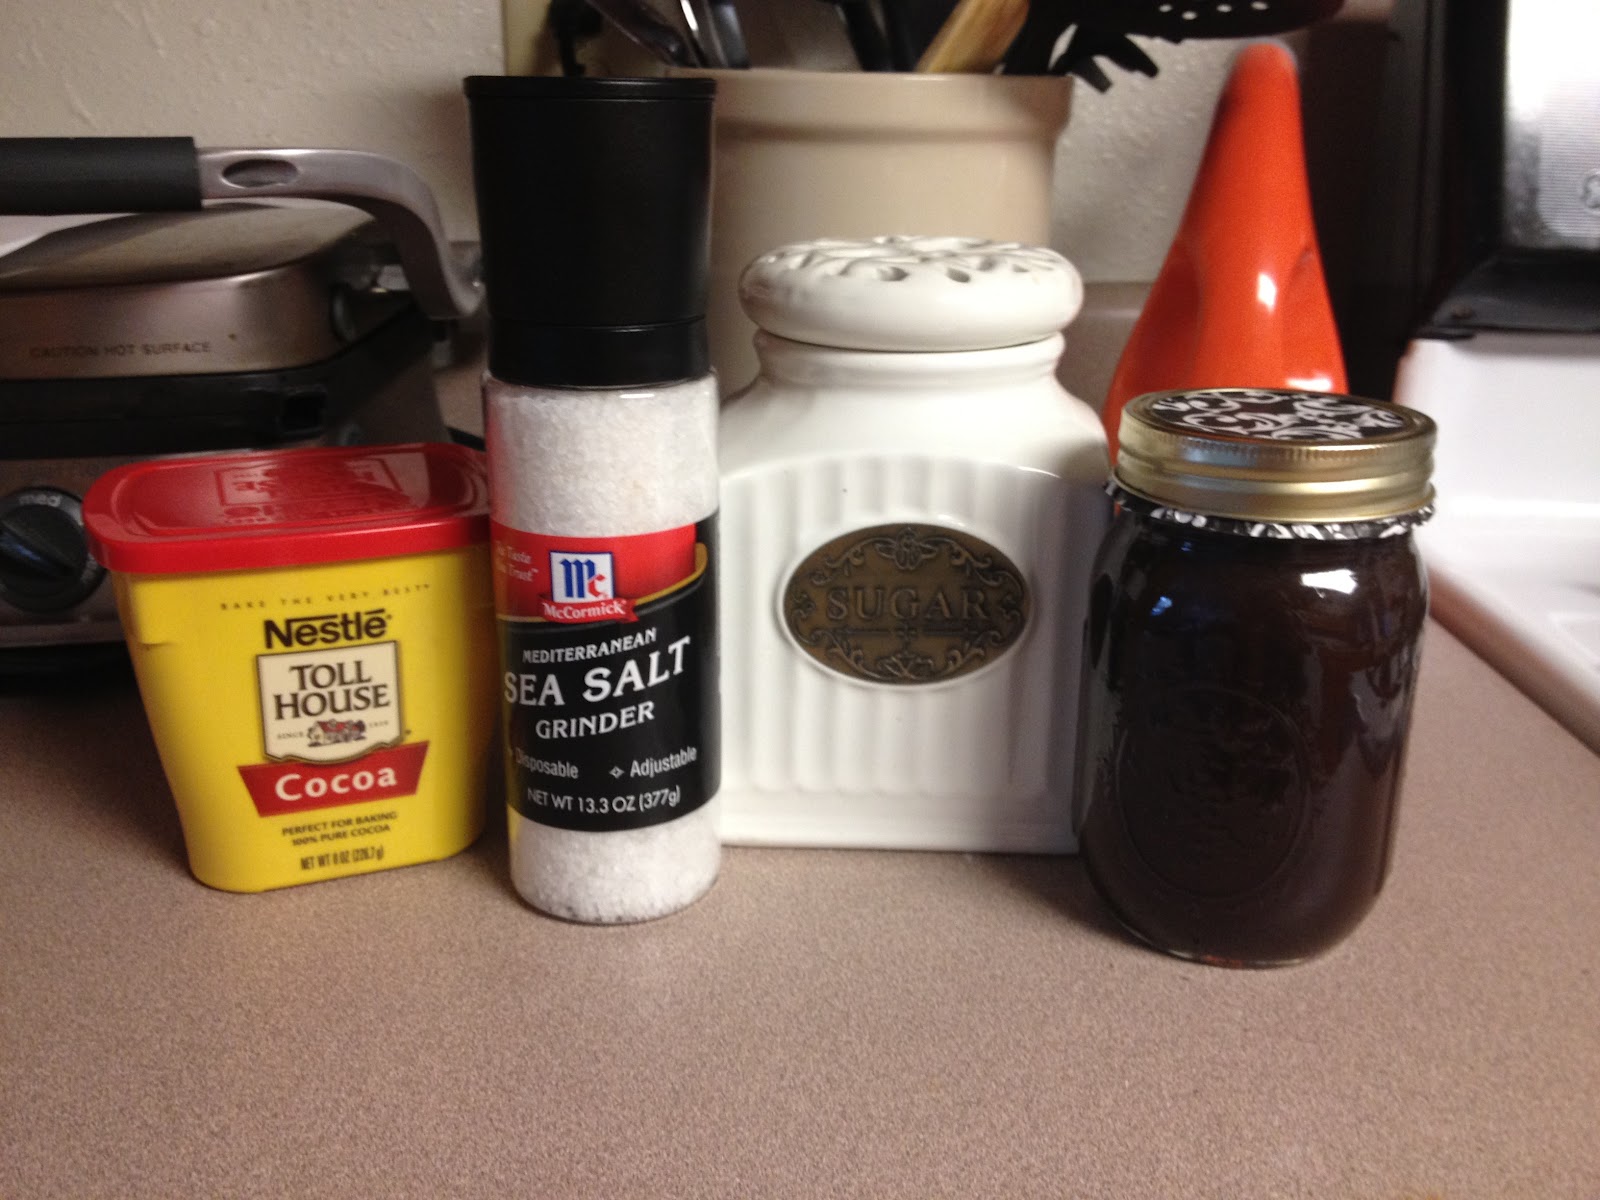
So, in my household we go through a butt load of chocolate syrup. My kids LOVE chocolate milk, and we ran out of chocolate syrup tonight.  I'm lazy and didn't want to run out to the store if I didn't have to.  I knew I seen a Pin on Pinterest for make your own chocolate syrup, I quickly checked it out to see if I had everything in my cabinet to make it- I was in luck! I did! Well, except vanilla extract, I forgot to pick some up during my last grocery trip, but I didn't think that would matter all that much.  So, here are my findings --
 Originial Pin
Homemade Chocolate Syrup (just cocoa powder, sugar, vanilla, water and salt)... no High Fructose Corn Syrup!

What you'll need:
1.5c sugar
3/4c cocoa powder
a pinch salt
1c water
1tsp vanilla (I feel this is optional, I omitted this item)

Now, combine sugar, cocoa powder and salt-mix well
Combine dry ingredients with water, wisk and bring to a boil
Once it's all mixed and boiling, remove from heat and let cool-if you were going to add the vanilla, you'd do this now.
Pour into a container and you're good to go!

Seriously, took me less than 10m. Here is the one pic I took to show you how much you get out of the recipe:

And then I looked on the back of my container of chocolate syrup I had purchased from the store and here's the ingredients:

I'll take my 4 ingredients (including the water) over Polysorbate 60 anyday!

Total cost:
I honestly can't say, because I had everything in my cabinet!  If I had to guess? .50?

Pin It

College Spirit Yarn Wreath

Hey Hey! Jen again :) My husband is a HUGE Oregon Ducks fan.  I'm a fan too, just not a big of a fan as he is.  When I was on Pinterest I decided to search Oregon Ducks and I found a few cute pins.  I found a CUTE yarn wreath from Etsy on Pinterest.  I am a DIYer, but I actually looked into purchasing this wreath, because it was that cute- BUT it was $60. Yes..you read that right...sixty dollars!  I was NOT spending that much money on a wreath..not happening. So I set off to Michaels to get the provisions to craft up this super cute decoration.

Here is the original Pin
Oregon Ducks Wreath Yarn Wreath Green Yellow and by TwoPinkies
Photo Credit TwoPinkies on Etsy

What you'll need:
Foam wreath form
Yarn in your teams 'main color' (mine was a dark forest green)
Yarn in an accent color (mine was black)
Felt in all of your teams colors (yellow, forest green, and white)
Hot glue
A template/pattern of your teams symbol


Step 1:
Wrap your wreath in your main color yarn.  Now, this is pretty self explanatory, but just in case.. you hot glue an end of your yarn onto what you plan to be the back of your wreath.  I pull out a bunch of yarn and cut it from the skein, it's easier to wrap the wreath form this way-just make sure when you need to glue the end of your yarn and start another section it's glued in the 'back'.

In the Process...
Finished! Make sure your yarn is completely covering the wreath, and there's no form showing through.

Step 2: 
Cut out felt squares I did mine 2"x2"

Step 3:
Arrange your felt squares on your wreath and hot glue them down


Step 4:
Use your other yarn color and create the argyle effect

Step 5:
Cut out your team symbol

Step 6:
Make all of your felt flowers. This is by far the most time consuming part of the whole project. I swear, I was making flowers for over an hour!  I didn't take photos of this portion because I was too busy making the dang flowers.

Step 7:
Arrange it all and hot glue it on!  I added accent pearls like in the original Pin because I wanted it to be as close as possible (I REALLY loved that wreath)

Step 8:
Hang up your wreath (if you're like me, with 10m to spare until your team kicks off) and admire your handy work..and blast that shit all over Facebook, Instagram & Twitter! :)


Total Project Cost:
Around $16, but I have yarn, felt, and a bunch of glass pearls left over

Total Time:
Way too damn long! In all honesty, it took me around 3-4 hours.

Pin It