Showing posts with label recipe. Show all posts

Sunday, March 10, 2013

Protein Energy Balls

Lately I've been on a health kick.  I started doing Insanity 2 weeks ago, and we are focusing more on eating clean.  Here's the problem: I am a chocolate addict.  Seriously people. It's bad.  I can honestly say that I don't really feel guilty when I inhale half a bag of Hershey Kisses while watching a movie.  But, alas, I knew there was a healthier way.

Now, I have a whole board dedicated to eating clean.  Most of the recipes I've tried, and honestly aren't too bad, some are actually REALLY good.  This one falls into the REALLY good category. 
Here is the original Pin


My favorite snack ever! These things are amazing!! So healthy!! No-Bake Energy Bites 1 cup (dry) oatmeal 1/2 cup chocolate chips 1/2 cup peanut butter 1/2 cup ground flaxseed 1/3 cup honey 1 tsp. vanilla

Looks pretty tasty right?  I looked up the ingredients list and I had all but one thing, which could be omitted if I wanted to.  Score!  So I got out my mixing bowl and the ingredients and got to work. 

Ingredients:
1c Oats
1/2c Peanut butter (I used all natural)
1/2c chocolate chips (I used the mini chips)
1/3c Honey (I used clear Agave Nectar, and not 1/3c of it..I would say half that)
1/2c Flax Seed
1tsp vanilla extract

Mix all ingredients together, let chill in refrigerator for 30m
Roll into 1" balls, return to the refrigerator


Easy peasy lemon greesy, as my 6 year old would say!  These are super fast to make and SUPER yummy!  They taste like a no bake cookie.  They're great when I'm craving sweets!  And I won't feel guilty.

So, people-if you're clean eating or not-try these! You won't feel guilty for eating them, or letting your kids eat them. Pin It

Wednesday, December 12, 2012

Guest Post: Sesame Street Party!

Hey everyone! Jen here.  Like most crafty people, I surround myself with other crafty people.  Jessica is a dear friend of mine, who also is another Navy wife.  I asked to her do a guest spot on the blog about her daughters birthday party that she did on the cheap!

Hi! I am Jessica of Jess Nicole Photography. I recently did an awesome birthday party for my sweet, darling daughter Ava's 2nd birthday! I decided to do a Sesame Street theme because Ava was really obsessed at the time. I wanted to do a whole party for about 20-30 people for under $250. I got pretty overwhelmed when I began thinking about food, decorations, invitations, and party favors. I turned to my beloved Pinterest for inspiration, my crafty background for the leg work, and my hubby, mom, and aunt to help me pull it all together!

Decorations:
First, I decided to go with a rainbow Elmo theme with a really cute rainbow chevron pattern. I found the perfect accent fabric (which really tied the whole thing together) at this Etsy shop- $20: http://www.etsy.com/shop/ShuShuStyle I ended up serging around the edges and using it as the food table runner.
 
Next, I decided to make a ton of the tissue pom pom balls to hang from my kitchen ceiling. The white ones I borrowed from a friend from her daughter's birthday a few weeks prior. The others I got from various stores: Hobby Lobby, Target, and Dollar General. Word of advice, don't buy tissue paper from Dollar General. It tears super easy. It's not a huge deal, but just so you know. Also, start on these a few weeks in advance. They can be time consuming. I followed this tutorial on Pinterest from the All Knowing, Martha Stewart: http://www.marthastewart.com/265163/pom-poms-and-luminarias-how-to I had two leaf sized trash bags full and I spent about $12. I did cut some of the tissue paper in half to make smaller, fuller balls. The mix really looked great hanging in a big cluster from the ceiling.

I got 3 blue metal tubs during the Wal Mart summer clearance sale for $2 each. I used them to hold iced water bottles for the adults and the other held iced juice boxes for the kiddies. The last one held party favors on her gift table.
I splurged and bought 2 linen table cloths for $20 total in lime green and fushia. I will be able to use these again and again.
The most expensive decoration, which was by far my favorite was 2 wreaths I made. One Elmo feather wreath ($15) and one yarn and felt Cookie Monster Wreath ($10).

I bought a fish bowl for $3 at Michaels to hold the Goldfish crackers.
I also bought, which I got *so* many compliments on, a Wilton 3 tier cake stand from Jo-Ann's. It was originally $35, but I had a 60% off one item coupon. Bringing it all the way down to $14. I can't wait to use this again!
I went to Hobby Lobby and used their 40% off coupon to purchase a small helium tank that was $27, but the coupon made it about $17 and 2 packs of balloons for $4.
For her gift table, I bought a book for everyone to sign birthday wishes in. I chose "If you Give a Pig a Party" by Laura Numeroff. It's a sweet little tradition we started on her first birthday.
I sat her Sesame Street Characters all around the food table and gift table. It was a really cute added touch.


Food:
I decided on a simple menu. One pleasing to adults and toddlers alike. I chose homemade chicken salad with crossiants, Italian pasta salad, hummus, cut up veggies for dipping, vegetable dip, fruit kabobs (huge hit!), Goldfish, and Alphabet cookies from Trader Joe's. I made all of these except the fruit kabobs the night before, and truthfully, that should have been done the night before also. It couldn't have been done with out my aunt! All of the food was under $60. The paper plates, napkins, and forks I actually traded for. They were new in the pack and I put a "in search of" post on a local Knoxville trade/swap group. That's a wonderful and economical way to get things you need or want. We bought a small cake and 30 cupcakes from Sam's Club, totaling $24.


A few other things I did, was hire a photographer to take pictures (except for these in this blog, these are mine) which was $40 because we worked out a massive trade between us. The last money saving thing I did was not send out invitations. I created a Facebook invite and called it a day. It's easy, time saving, money saving, and practical. Since I am a photographer, I took her birthday pictures and used those pictures to dress up her Facebook invite. I wanted to display those adorable pictures, so placed them in frames around the house and I pinned a piece of wrapping tulle to the wall and tied a bow on each end. I hung pictures of her on that with clothespins for FREE! It was so cute, I kept it up and it is now used to display her artwork.

The Breakdown:
Food: $60
Decorations: $121
Cake: $24
Photographer: $40
Total: $245


Finally, on her actual birthday morning, I made her Cake Batter Pancakes from Chef in Training (found via pinterest) :  http://www.chef-in-training.com/2011/06/cake-batter-pancakes/
They were good, sickeningly sweet, but a great way to start off her life as a two year old! She loved them, in my opinion, they were a bit tough. I have no suggestion as to how to fix this. We ate them, nonetheless.
Pin It

Sunday, November 4, 2012

Garden Tomato Sauce

I love pasta. Love.  If one day I had to cut carbs out of my diet, I would be a wreak..a healthy portion of my favorite dishes are pasta dishes.  You would think that if I love pasta so much that I would have a good red sauce recipe, right? Well, that wasn't the case-until today.

So, I pinned the garden tomato sauce recipe pin a while ago, mainly because the picture made it look oh so tasty.  Now, seeing how it's November I had to use store bought tomatoes.  Even if it was gardening season, I live in military housing with a tiny backyard that gets NO sun. None.  There was a family that lived across the court yard that grew corn in their back yard our first summer here. I hated them. They got the stink eye every time I went in my super shaded can't even grow grass back yard. Okay, enough about the crap hand of a backyard we were dealt.  This recipe would be even better if I did have a garden though..because I wouldn't have had to buy ANYTHING for it.

Here is the original Pin
Garden Tomato Sauce over Pasta from Southern Living. Made with fresh tomatoes from garden :) Garlic, onions, salt, pepper, olive oil, and red wine. You can even freeze it if you have tomatoes coming out the wazoo!
See!? Yum Yum!!

Now, I altered the recipe some, not much..but some.

Here is the original recipe from myrecipes.com

Ingredients:
1 onion diced
tablespoon olive oil
1 garlic clove, minced
4 medium size heirloom tomatoes (about 2lbs) cored and chopped
Kosher salt
Fresh ground pepper
1/4 cup red wine
3 tablespoons chopped fresh oregano or marjoram Hot cooked pasta
Garnish: fresh oregano leaves
Now. I don't have red wine. I don't drink it, I don't regularly use it to cook with, so I substituted chicken stock.  I think this is a great recipe to use as a starting place for someone to make their own.  We eat clean (mainly, we do cheat sometimes) so if I can make my own anything, I'm going to attempt it!

Here are my ingredients that I used-
1 onion diced
1 tpsp olive oil
1 clove garlic, minced
3 1/2 off the vine tomatoes (they didn't have heirloom at Food Lion when I went, and these suckers were on sale, and fairly large, about the size of beef steak tomatoes), diced
Sea Salt
Pepper
1/4c Chicken stock
1 1/2 tsp Tomato paste
Pinch sugar
Dried oregano, marjoram, and Italian seasoning
Cayenne Pepper
Cooked Pasta
Shredded Mozzarella

Now. The original recipe says to use a dutch oven. I don't have one. BUT I do have my super awesome deep oval shaped Rachel Ray pan.  NOTHING sticks to this beast so it's my go to when dealing with tomatoes/tomato sauce recipes.

Heat oil in pan, and add your onions, let them cook for around 3 or so minutes-basically until they're soft.  Throw in the garlic and stir it up, let that cook for about another minute or so.  Then add your diced tomatoes and mix it all up.  Let that cook until the juices start coming out of the tomatoes.  Around this time the original recipe said to add your pepper and salt to taste, but I don't like adding seasoning until the end, so I'll know what the finished product will taste like, but feel free to season with salt and pepper to taste now if you'd like.  Once the tomatoes start releasing the juices add your chicken stock (or red wine) and stir in the tomato paste.  Let that simmer and thicken up a bit ( it shouldn't take too long).  Now add your pinch or two of sugar, and your seasonings to taste.  Feel free to omit the cayenne, I like my sauce to have a little bit of a bite to it.  Once you have it tasting delicious I let mine simmer on low until my noodles were done.  The mozzarella isn't really needed. but my kids like a sprinkle of cheese on their pasta, and a sprinkle of mozzarella never hurts anything in my opinion. 

Please excuse the poor lighting in my kitchen.
Pin It

Tuesday, October 23, 2012

Stuffed Cheese Buns..a love story..

Yes, that's right people a love story. These rolls, buns, whatever you want to call them are that good.

Magnificent even.

Tonight is duty night in the Christopher household. What that means for dinner is that it's normally easy peasy night.  Tonight was pasta. Not a fancy pasta, just boiled ruffle noodles and a jar of sauce.  So, because dinner was going to take all of 30 seconds to prepare I thought I'd make some sort of bread to go with it, and I knew just what bread to make. I have been drooling over the image of these cheesy buns ever since I pinned them. Seriously.

Here is the original Pin and the drool worthy picture..

Stuffed Cheese buns
Image credit: myfridgefood.com

I mean really. What is not to love about that image!?  So I set off to my cabinets to make sure I have all of the paraphernalia to make these delicious lumps of cheesy goodness. Jackpot. It's all there.  I read over the directions..super easy, laid out to where you should have no problem producing the garlicy dough.  Now, I'm not including step by step instructions/pictures because it really is that easy.  I did do a couple things different though.  I didn't have chunks of mozzarella (directions call for a 3/4" chunk of mozz) all I had was shredded mozzarella, but it didn't pose a problem.  I just pinch a chunk of it and worked it in there.  The recipe also said that she used shredded cheddar jack an swiss for the cheese on top, I used fresh shredded Parmesan and mozzarella.  I also sprinkled some garlic salt on the rolls before putting the cheese on top.

So you should get 20 rolls, hopefully they'll last you at least a day. My kids LOVED them as much as I did. My oldest had maybe 3, my daughter had close to 3 as well-but after taking her first bite she told me I was the best cooker ever! Oh yeah, that's right. I got the 3 year old's seal of approval.  

Really people. Make these rolls. Unless you're lactose or gluten intolerant-then don't, but know, I fell bad that you can't enjoy these bites of cheesy heaven.

And here are what my rolls looked like.  Just because sometimes you can't trust the pin picture. :)
Pin It

Wednesday, September 5, 2012

Make Your Own Chocolate Syrup

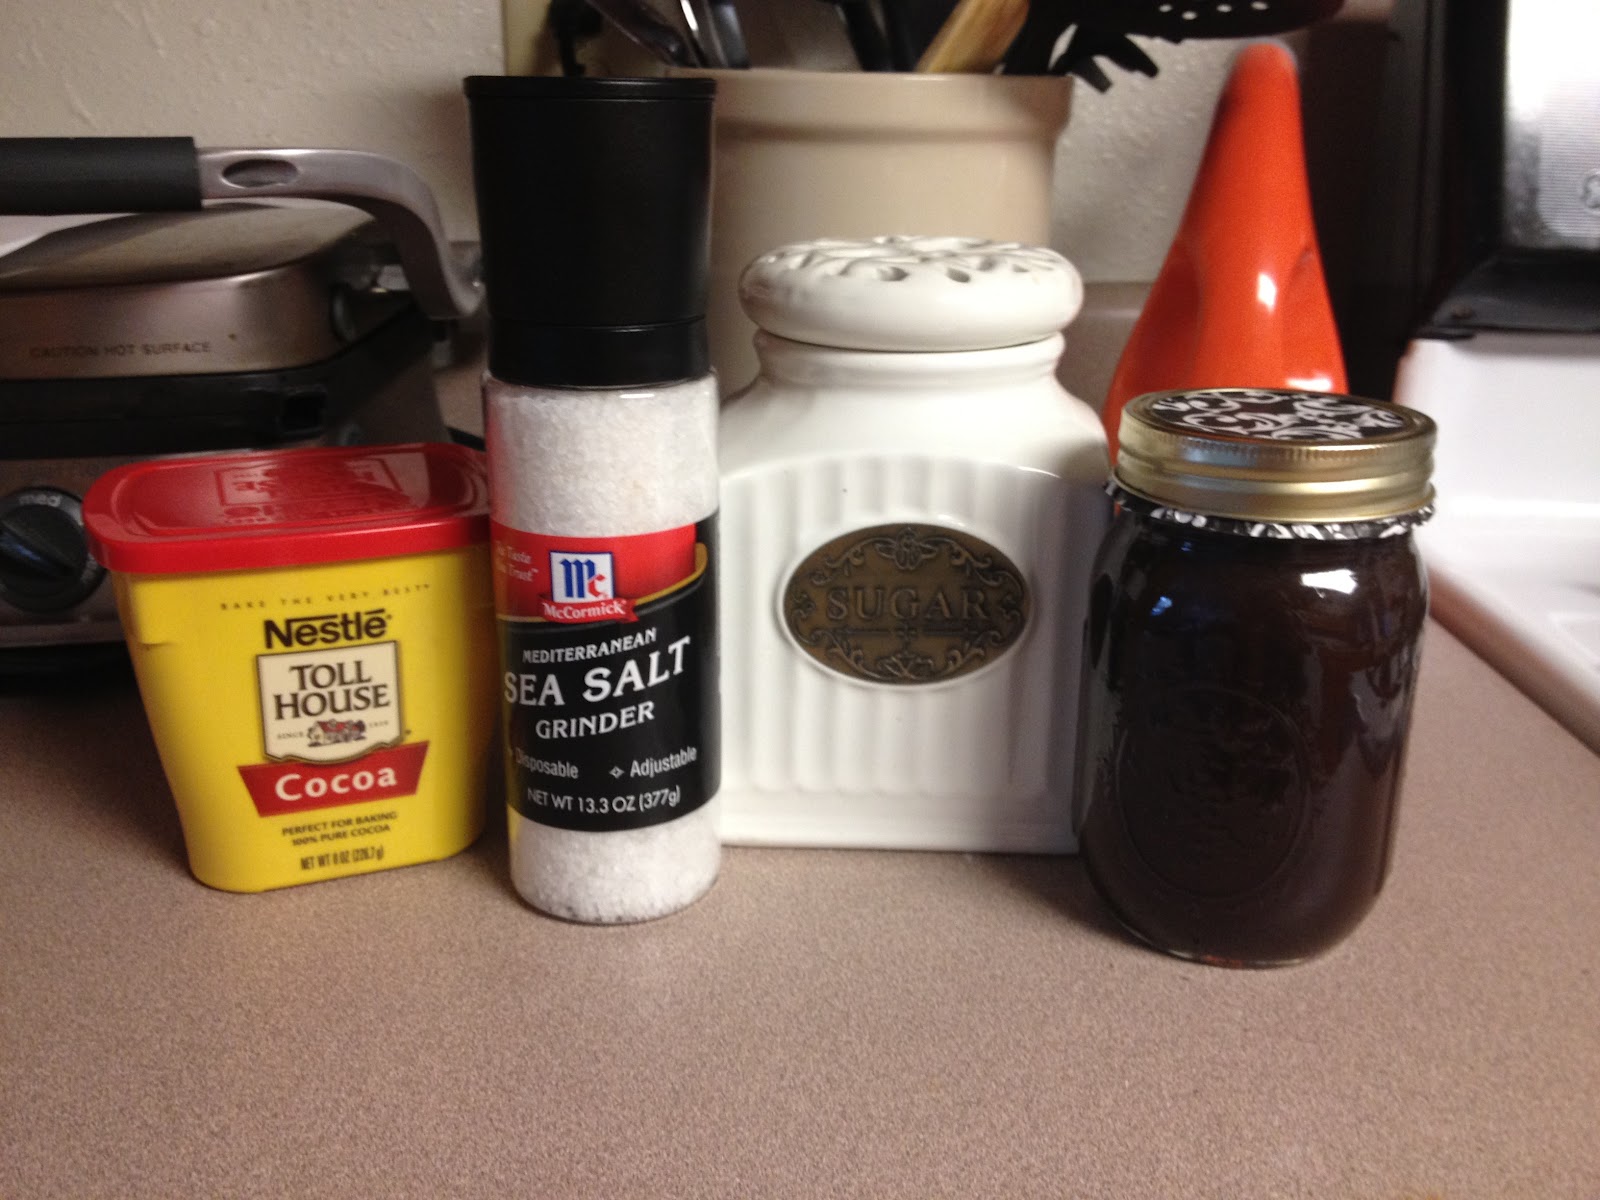
So, in my household we go through a butt load of chocolate syrup. My kids LOVE chocolate milk, and we ran out of chocolate syrup tonight.  I'm lazy and didn't want to run out to the store if I didn't have to.  I knew I seen a Pin on Pinterest for make your own chocolate syrup, I quickly checked it out to see if I had everything in my cabinet to make it- I was in luck! I did! Well, except vanilla extract, I forgot to pick some up during my last grocery trip, but I didn't think that would matter all that much.  So, here are my findings --
 Originial Pin
Homemade Chocolate Syrup (just cocoa powder, sugar, vanilla, water and salt)... no High Fructose Corn Syrup!

What you'll need:
1.5c sugar
3/4c cocoa powder
a pinch salt
1c water
1tsp vanilla (I feel this is optional, I omitted this item)

Now, combine sugar, cocoa powder and salt-mix well
Combine dry ingredients with water, wisk and bring to a boil
Once it's all mixed and boiling, remove from heat and let cool-if you were going to add the vanilla, you'd do this now.
Pour into a container and you're good to go!

Seriously, took me less than 10m. Here is the one pic I took to show you how much you get out of the recipe:

And then I looked on the back of my container of chocolate syrup I had purchased from the store and here's the ingredients:

I'll take my 4 ingredients (including the water) over Polysorbate 60 anyday!

Total cost:
I honestly can't say, because I had everything in my cabinet!  If I had to guess? .50?

Pin It

Wednesday, August 15, 2012

"Easy Homemade French Bread"

Hey everyone, Jen here :)  Yet another Pinterest recipe post. I wasn't going to blog this recipe, but as I was going along, I thought I should document with photos just incase.  Luckily, for me (and you) I did.

Here is the original Pin
EASY Homemade French Bread for about $0.25 a loaf- make 4 loaves in an hour

The Pin promised four loaves of french bread for $1.00 in about an hour. Perfect!  I LOVE fresh bread, so making my own in under an hour would be amazing!  My younger two were napping, and I had (at least) an hour to spare!  So I head to the cabinets and get all the paraphernalia together to get this yumminess going.

Ingredients:
2 1/2c warm water
2 tbs yeast
2 tbs sugar
2 tbs white vinegar
1 tbs salt
1/3c oil
6-7c flour (or more if it's too soft)

That was the ingredients list from the blog that the pin links too.  Okay, here's the problem.  What she doesn't say until you read the comments under the post on her blog that you need to use INSTANT YEAST. I unknowingly got Active Yeast.  I didn't know that until I was half way into the recipe. Thought I'd put that out there..umm..NOW. *Pet Peeve* If you're going to write a recipe out on the internet for others to use, maybe you should consider putting in all the knitty gritty details...just sayin'. Anyway..

Here's my steps in photo/caption form. :)

My ingredients.  I used olive oil (orange container), it's what I normally cook with.  You can use any oil I presume..

Step 1
Combine warm water, yeast (INSTANT), sugar and white vinegar into your mixing bowl.  Now this kind of confused me. Maybe I'm an idiot..but I didn't know if I was supposed to mix it up, or just combine the ingredients in the bowl...I ended up mixing them.  Anyway, you wait for the mixture to start bubbling (claimed to be 3-5m wait)
this photograph is from before I actually mixed it up

Step 2
Add salt, oil and flour, one cup at a time while mixing.  Okay..sounds good...recipe calls for 5-6 cups..umm..mine was still really sticky/soft at 6c..So I ended up adding more like 7 cups.
This was after just the 6 cups..wayyy to soft

Step 3
Kneed dough for 3-5 minutes. Honestly, this was one of the most difficult steps. Maybe my dough was still too soft? But I made a GIANT mess of my hands and called it good after 2 minutes or so.  After you kneed the dough the recipe calls for you to put the dough (in the bowl) in the oven (I presume the oven is off, because it doesn't say otherwise) with a sauce pot of boiling water.  Apparently, the dough should rise and you should punch it back down when this happens.  It should be in there for 3-5m.  Yeah, that didn't happen.  I put it in the oven with the water for close to 10m and it didn't look like it rose at all.  

Step 4
Form into loaves and place on a greased cookie sheet sprinkled with cornmeal.  I, who like most read an ingredients list and make sure I have those items on hand when attempting a recipe, was unaware that there was cornmeal needed for this recipe (because it WASN'T on the ingredients list!).  So I just sprinkled flour over the greased cookie sheet and called it good.  Once you get your loaves formed cut 3-5 slits on top and cover with some egg wash (a beated egg-which lucky for me I have eggs on hand 24/7, because again, it wasn't on the ingredients list).

Step 5
Put the pan in the oven set at 170 and let the dough rise.  Once it's risen enough just turn the oven up to 375 and let it cook.  The actual recipe didn't really give a time it just said until it was done. Ohhhkayyy...  Mine was in the oven for approximately 20m.
I honestly didn't know if the yeast was going to work because I wasn't sure if I jacked up the recipe-but it rose, and it worked!

And here it is 20 minutes later. :) 

Verdict: eh. It's okay.  The kids really like it. I think I'm more of a yeast bread person.  It's a fairly easy recipe, and it took closer to 2 hours start to finish..but I was also stopping to take photographs through out the way. OH and I want to add-I got 2 decent sized loaves out of the recipe.  If you tried for 4 (like the pin promised), they'd be pretty small.

Total Cost: pennies.  I had everything but the yeast on hand.  The whole jar of yeast cost me $3, and I only used 2 tablespoons.  

Pin It

Sunday, July 29, 2012

Apple Pie Breakfast

Hey all, Jen here!  So, if you follow me on Pinterest, you would know that I go on crazy pinning sprees every few days.  I came across this super yummy looking breakfast a few days ago-Apple Pie Breakfast.  Sounds amazing, right!?  If you like apple pie anyway, and seeing how my oldest uses the saying "I love you more than apple pie" constantly, it's safe to say they we loves some apple pie!  So, I decided to try my hand at this breakfast. It's really not complicated, so I didn't take 'step' photographs.

Here is the original Pin photograph and the LINK
Photograph is from the Cooking With Jax website

The original Pin said "throw it all in a slow cooker and let it cook over night".  This excited me. How great would it be to wake up to the smell of apples and cinnamon!?  When I went on to read the directions for this recipe, it says you have to stir it every hour. ha. ha. I am not getting my butt up out of bed to stir something. Sorry. Anyways...

Ingredients:
1c steel cut oats
3 diced apples
1c apple juice
3c water
1/2 tsp cinnamon

Now, the directions said to throw all the ingredients in a slow cooker and cook it for 2-4 hours on high or 4-6 hours on low, stirring every hour.  It ALSO said that you can cook it on the stove top for approx. 30m, but you might have to adjust the amount of liquid in the recipe so it would be the right consistency.  

What I did:
Instead of using steel cut oats (because I didn't have any on hand, and I had everything else) I used regular old rolled oats or whatever they're called.  I threw everybody in the pool and cooked it on the stove top, stirring occasionally.  Here's what it looked like prior to being cooked:

It smelled amazing, I was very excited to try it. Then I did. . . and my taste buds were filled with disappointment. It was pretty bland. I added a little sugar to sweeten it up a bit, and that made it a tad better.    Here's what it looked like fully cooked and ready to go in my tummy:

My oldest loved it, and had 3 servings.  All in all, it's a pretty decent, cheep, semi fast, filling breakfast.  After I ate mine, I had the idea of adding some lemon juice to give it the tart kick apple pie has, but my in-laws didn't have any. So, I will have to try this again when we get back to Virginia and add the lemon juice, and update this post with my findings.  Total approximate cost for this breakfast:  $1.85. Yes, $1.85.  I would say it yields 4-6 servings, depending on your serving size. 

Pin It

Tuesday, July 24, 2012

Pizza Bread

When I seen the idea for the Pepperoni Pizza Bread, I immediately thought 'lunch'.  I love pizza, and creating little pizza's is the best option for my kids, because God forbid everyone want the same thing on their pizza.  Anyway, here is the link to the Pin.
Here is the image from Taste of Home, where the Pin originated from:

Now, something that should be known about my children: they all have different tastes, and like different stuff on their pizza, like most I'm sure.  My oldest doesn't like pepperoni, I think there might be something wrong with him..I'm joking (kind of). So, just doing what's pictured above wouldn't work for us.  So, I changed up the recipe a bit.. here's my take on the Pepperoni Pizza Bread:

Ingredients:
Mozzarella, Italian Bread, butter, garlic salt, pizza sauce, and your favorite pizza toppings-I used pepperoni and canned mushrooms

The Process:
Preheat oven to 350 degrees

Cover one side of the bread with butter and sprinkle with garlic salt

Flip the bread over and cover with pizza sauce-I use a decent amount because the bread with absorb some of the sauce leaving your mini pizzas kind of dry if you don't use enough sauce.

Now sprinkle on the cheese and put on your toppings.  When it comes to the pepperoni's, it's my preference to use kitchen shears and cut up the pepperoni's before putting them on the mini pizzas, otherwise it's too much pepperoni for me.  

Now pop em in the oven until the cheese is melted and the bottoms have a golden brown color

Enjoy!

The butter and garlic salt on the bottom gives the crust a garlic bread taste...so yummy!!
I made 9 mini pizzas and the total cost was $2.45! Nice cheap yummy lunch.

Pin It