Sunday, January 5, 2014

Winter CandyLand 1st Birthday Party!

My little Christmas Present turned 1 this past December.  When searching for a theme I searched Pinterest for a few days.  I was originally going to go with the Winter ONEderland theme, but it seemed that it was quite the popular theme.  Wanting to be a little different I came across the Winter CandyLand theme and LOVED it.  What's better than candy, cookies and sweets!?

I purposely scheduled the party at a 'non-eating' time so I didn't have to throw serving a meal on top of everything else I was doing.  I did everything, but baking the cake, and the cake pops myself.

One of my favorite items from the party was the sucker tree. The kids (and adults!) LOVED it.  I got the candle holder from Hobby Lobby (8.99 on sale), and I used a 6" styrofoam ball and cut one end off so it sit flat on the candle holder. From there I filled it with Dum-Dum suckers.  It took A LOT of suckers to fill this thing.  But, it's still in the kitchen, I keep refilling it. It's such a colorful cute decoration.

The cookies. I was VERY specific on the cookie cutters I wanted. I searched multiple stores (and had my in-laws looking) for a wrapped candy shaped cookie cutter. I FINALLY found it at Joanne Fabrics.  The cookies themselves I just used Pillsbury sugar cookie dough out of the tube. I know, I know..cheater. But I put a lot of time and effort into decorating that I really didn't want to put that much effort into baking. I made a lot of cookies, so I used two of the large tubes. I honestly don't even know if they sell them when it's not Christmas time.  For the icing/glaze I mixed powdered sugar and a tiny bit of milk until I got the consistency I wanted.  I then added the coloring gel (Wilton brand that comes in a little jar..around $1.75/color at Walmart) and transferred it to the piping bags.  They do sell white coloring as well, which I did use. I believe I got that at Joanne's too.  Not going to lie. I was decorating for around 4 hours. I got about two and a hlaf episodes of the Following (on Netflix) into it and was asking myself what was I thinking!?  I have to say the time and effort were worth it though. Those snowmen rocked.

The cake. Oh this cake was specific.  I thought it was going to be super easy. White round cake, red polka dots and red trim. I mean, how hard? Right? Apparently it was very confusing for the poor girl at Sam's Club.  Twenty minutes later I felt moderately sure that she understood what I wanted.  I was greatly relieved when I picked it up and it was perfect.  All I had to do when I got home was add the cookies and suckers (got those at Party City).


Now for the candy. Oh..lots and lots of candy.  We had Dum-Dums obviously, Starbursts, M&M's, blue and red Sixlets (color specific from Meijer 2/$5), Hershey's Kisses (chocolate and candy cane flavor), red candy coated marshmellows on a stick, Sourpatch kids, and Candy Canes.  I got these cute red and blue scoops from Party City as well.  The candy was used as the goodie bag.  I bought red and blue small gift bags and red and blue tissue paper. Each bag had the opposite color tissue paper, and before the kids left they got to pick out some candy and cookies to take home.  The parents loved that idea. 

All in all it turned out just as I had planned. The kids LOVED it. I'm still the favorite aunt..my niece wants to have a Candy Land birthday party for her next birthday.  

And here's the happy Birthday Boy!  

Pin It

Sunday, June 16, 2013

#longlashes fail

I was so so excited to do the #longlashes influenster. I put the serum on every night before bed...that is until last night. I heard Moose upstairs in the bathroom,  so I went up to investigate.  I find him with my tube of Fysiko open & he was running around. I managed to stop him and snatch it away.   I went to put the brush back and I noticed it sounded quite liquidy.  After some investigation I realised that he had submerged the open tube in the toilet.

Needless to say, this influenster is over for me. I'm so bummed. :(

Pin It

Thursday, May 9, 2013

Fysiko Lashes

Now, this post isn't going to be like the other posts on this blog.  I had signed up for this program called Influenster a few months ago.  I had gotten a survey about my eyelashes, so I filled it out and a week or two later I got another email that said I was chosen to receive a new product that increased the length and thickness in your eyelashes in as little as 2 weeks.  

Now, if you know me in real life, you'd know that my kids, especially my oldest has the LONGEST lashes ever. I'm not kidding! When he went and got his glasses fitted they couldn't make them as tight as they needed to be because his lashes would have hit the lenses!  So, I'm always asking him if I can have his eyelashes. He always tells me no. :(

Well, thanks to a product called Fysiko Lashes I can grow my own long lashes!  I just got the product in the mail today, I have to apply it to my upper eyelid like a liquid eyeliner every night. Best results are at 16 wks.  So, naturally I rushed and took off my makeup tonight and applied the product as instructed. 
Here's what the brush looks like

I am super excited to see the results and share them with you! 

Here is my 'before' picture

*I was given this product free of charge, and not paid in anyway to test/review it


Pin It

Sunday, March 10, 2013

Protein Energy Balls

Lately I've been on a health kick.  I started doing Insanity 2 weeks ago, and we are focusing more on eating clean.  Here's the problem: I am a chocolate addict.  Seriously people. It's bad.  I can honestly say that I don't really feel guilty when I inhale half a bag of Hershey Kisses while watching a movie.  But, alas, I knew there was a healthier way.

Now, I have a whole board dedicated to eating clean.  Most of the recipes I've tried, and honestly aren't too bad, some are actually REALLY good.  This one falls into the REALLY good category. 
Here is the original Pin


My favorite snack ever! These things are amazing!! So healthy!! No-Bake Energy Bites 1 cup (dry) oatmeal 1/2 cup chocolate chips 1/2 cup peanut butter 1/2 cup ground flaxseed 1/3 cup honey 1 tsp. vanilla

Looks pretty tasty right?  I looked up the ingredients list and I had all but one thing, which could be omitted if I wanted to.  Score!  So I got out my mixing bowl and the ingredients and got to work. 

Ingredients:
1c Oats
1/2c Peanut butter (I used all natural)
1/2c chocolate chips (I used the mini chips)
1/3c Honey (I used clear Agave Nectar, and not 1/3c of it..I would say half that)
1/2c Flax Seed
1tsp vanilla extract

Mix all ingredients together, let chill in refrigerator for 30m
Roll into 1" balls, return to the refrigerator


Easy peasy lemon greesy, as my 6 year old would say!  These are super fast to make and SUPER yummy!  They taste like a no bake cookie.  They're great when I'm craving sweets!  And I won't feel guilty.

So, people-if you're clean eating or not-try these! You won't feel guilty for eating them, or letting your kids eat them. Pin It

How to Remove Crayon From Fabric

I have neglected the blog. I can admit it. BUT in my absence I have given birth to our fourth (yes...FOURTH!) child, so I have been busy. Back to the reason for this post.  My three older children's birthday's were last month.  Seeing how the need new toys like Taylor Swift needs another ex-boyfriend we got them mainly clothes.  I had found this super cute yellow striped cardigan & teal jeggings from The Children's Place and gotten them for Miss Fluffy. 

The day the box with the clothes arrived, I put them on her. Of course she looks adorbs.  AND because these are brand new clothes I'm super anal about her not staining them.  Family of 6 + 1 income = not a lot of extra money to replace clothes.  So, she made it through lunch, dinner, snacks... no stains! Awesome! I call her to the living room to get her jammers on before bed and what do I see??  Magenta crayon on the thighs of those brand new teal jeggings.  Yes...MAGENTA! Oh I was mad.  This happened early February and she's STILL grounded from crayons.  She's four people-she knows better.  Anyway. I, of course, went to Pinterest to figure out how to remove the crayon from the fabric.  I've heard of a few different ways, but the most common on was to sandwich the fabric in between paper towel and crank up the iron.  Supposedly the heat from the iron would transfer the crayon wax onto the paper towel. Viola- no more crayon stain. 

I don't think I actually re-pinned this one because it was so self explanatory that if it worked I wouldn't need to go and look back on it, I would just remember.  Well, guess what? Didn't work.  But I did burn the ever loving crap out of my forearm on the iron while reaching for something in the cabinet.  Here's my lovely scar. wahh! It does look a little like a sluggy alien with it's mouth open though..


File this one under bust ladies and gentleman.  Tried it. Burnt my arm. Didn't work.
Update: I was able to get the crayon out with a good saturation of Clorox 2 stain remover spray.
Pin It

Wednesday, December 12, 2012

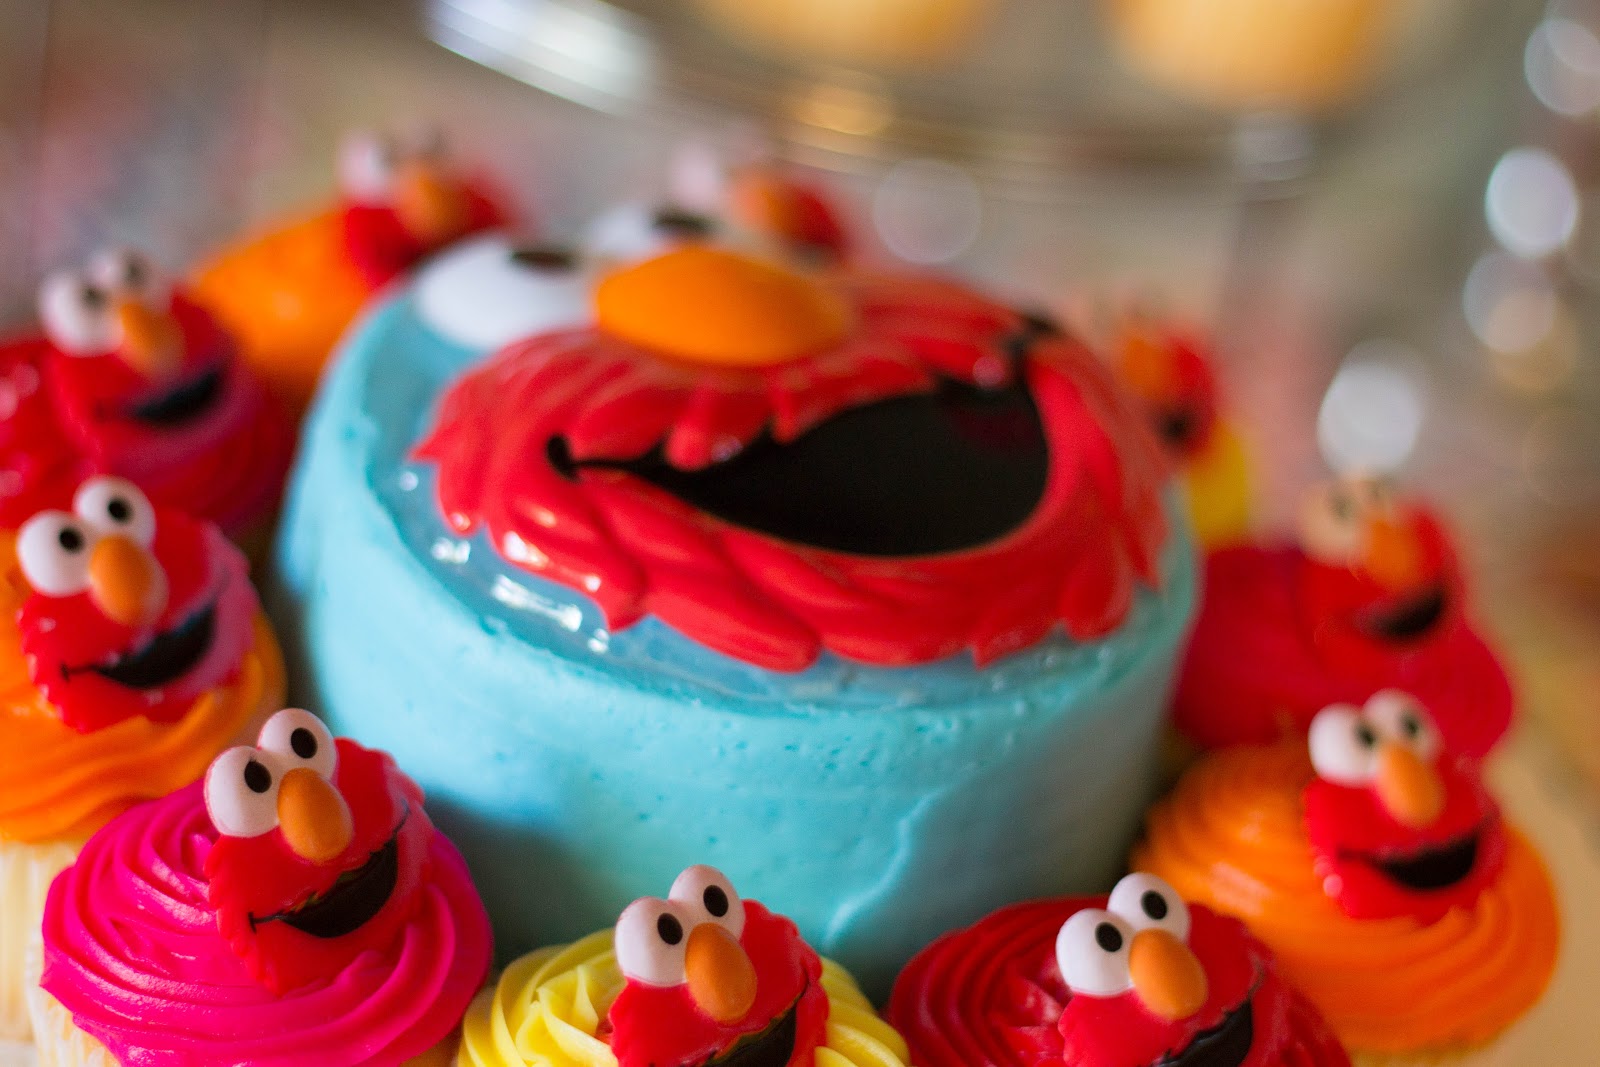
Guest Post: Sesame Street Party!

Hey everyone! Jen here.  Like most crafty people, I surround myself with other crafty people.  Jessica is a dear friend of mine, who also is another Navy wife.  I asked to her do a guest spot on the blog about her daughters birthday party that she did on the cheap!

Hi! I am Jessica of Jess Nicole Photography. I recently did an awesome birthday party for my sweet, darling daughter Ava's 2nd birthday! I decided to do a Sesame Street theme because Ava was really obsessed at the time. I wanted to do a whole party for about 20-30 people for under $250. I got pretty overwhelmed when I began thinking about food, decorations, invitations, and party favors. I turned to my beloved Pinterest for inspiration, my crafty background for the leg work, and my hubby, mom, and aunt to help me pull it all together!

Decorations:
First, I decided to go with a rainbow Elmo theme with a really cute rainbow chevron pattern. I found the perfect accent fabric (which really tied the whole thing together) at this Etsy shop- $20: http://www.etsy.com/shop/ShuShuStyle I ended up serging around the edges and using it as the food table runner.
 
Next, I decided to make a ton of the tissue pom pom balls to hang from my kitchen ceiling. The white ones I borrowed from a friend from her daughter's birthday a few weeks prior. The others I got from various stores: Hobby Lobby, Target, and Dollar General. Word of advice, don't buy tissue paper from Dollar General. It tears super easy. It's not a huge deal, but just so you know. Also, start on these a few weeks in advance. They can be time consuming. I followed this tutorial on Pinterest from the All Knowing, Martha Stewart: http://www.marthastewart.com/265163/pom-poms-and-luminarias-how-to I had two leaf sized trash bags full and I spent about $12. I did cut some of the tissue paper in half to make smaller, fuller balls. The mix really looked great hanging in a big cluster from the ceiling.

I got 3 blue metal tubs during the Wal Mart summer clearance sale for $2 each. I used them to hold iced water bottles for the adults and the other held iced juice boxes for the kiddies. The last one held party favors on her gift table.
I splurged and bought 2 linen table cloths for $20 total in lime green and fushia. I will be able to use these again and again.
The most expensive decoration, which was by far my favorite was 2 wreaths I made. One Elmo feather wreath ($15) and one yarn and felt Cookie Monster Wreath ($10).

I bought a fish bowl for $3 at Michaels to hold the Goldfish crackers.
I also bought, which I got *so* many compliments on, a Wilton 3 tier cake stand from Jo-Ann's. It was originally $35, but I had a 60% off one item coupon. Bringing it all the way down to $14. I can't wait to use this again!
I went to Hobby Lobby and used their 40% off coupon to purchase a small helium tank that was $27, but the coupon made it about $17 and 2 packs of balloons for $4.
For her gift table, I bought a book for everyone to sign birthday wishes in. I chose "If you Give a Pig a Party" by Laura Numeroff. It's a sweet little tradition we started on her first birthday.
I sat her Sesame Street Characters all around the food table and gift table. It was a really cute added touch.


Food:
I decided on a simple menu. One pleasing to adults and toddlers alike. I chose homemade chicken salad with crossiants, Italian pasta salad, hummus, cut up veggies for dipping, vegetable dip, fruit kabobs (huge hit!), Goldfish, and Alphabet cookies from Trader Joe's. I made all of these except the fruit kabobs the night before, and truthfully, that should have been done the night before also. It couldn't have been done with out my aunt! All of the food was under $60. The paper plates, napkins, and forks I actually traded for. They were new in the pack and I put a "in search of" post on a local Knoxville trade/swap group. That's a wonderful and economical way to get things you need or want. We bought a small cake and 30 cupcakes from Sam's Club, totaling $24.


A few other things I did, was hire a photographer to take pictures (except for these in this blog, these are mine) which was $40 because we worked out a massive trade between us. The last money saving thing I did was not send out invitations. I created a Facebook invite and called it a day. It's easy, time saving, money saving, and practical. Since I am a photographer, I took her birthday pictures and used those pictures to dress up her Facebook invite. I wanted to display those adorable pictures, so placed them in frames around the house and I pinned a piece of wrapping tulle to the wall and tied a bow on each end. I hung pictures of her on that with clothespins for FREE! It was so cute, I kept it up and it is now used to display her artwork.

The Breakdown:
Food: $60
Decorations: $121
Cake: $24
Photographer: $40
Total: $245


Finally, on her actual birthday morning, I made her Cake Batter Pancakes from Chef in Training (found via pinterest) :  http://www.chef-in-training.com/2011/06/cake-batter-pancakes/
They were good, sickeningly sweet, but a great way to start off her life as a two year old! She loved them, in my opinion, they were a bit tough. I have no suggestion as to how to fix this. We ate them, nonetheless.
Pin It

Saturday, December 1, 2012

North Pole Breakfast

It's that time of year again...December 1st...and our Elf on the Shelf 'Elfie' has arrived! Yes, my kids got super creative with the name. My husbands in the Navy and will pretty much be out to sea this whole month..but I will NOT let that ruin the kids Christmas and all the magic that entails-enter The North Pole Breakfast.  I found this Pin while looking for Elf on the Shelf ideas and LOVED it. 
Here is the original PIN
North Pole Breakfast, love this idea.

How fun right!? 

Okay, first I'm going to go through a run down of everything I got for this little event.  I went into this thinking it was going to be pricey.  Thank God for Dollar Tree & Walgreens Rewards coupons!

--From Dollar Tree I got: Elf hats, socks, candy canes, candy cane straws, serving platters/bowls, snowflakes and the coffee mugs: around $17
--From Walgreens: coloring books, activity pads, note pads and ornaments: $2 after rewards
--From Target: plates and placemats: $12

Alrighty.  I am exhausted. I was up until 1:30am last night/this morning setting this thing up.  I then had to set my alarm for 6:45 to wake up before my daughter (the early riser) so I could finish setting up. 

The spread:

Just a glimpse at the table..
 
 
Nummy cinnamon rolls with red & green sprinkles
 
Peppermint Kisses (me & Moosey's favorite!)
 
North Pole Milk (green food coloring & peppermint extract milk)
 
Winter Oreos
 
Snow covered donut kabobs
 
 Fluffy's plate-she ate her donuts and the good half of her Oreo
 
 Ky's plate- he ate his donuts & Kiss
 

 The main Elf man himself...Elfie!


Just some randoms of the set up: 


Pretty snow flakes 
 
 Ornaments
 
 Ky in his Elf hat
 
 Miss Fluffy in hers
 
 Socks (Moose wasn't awake yet, but his are the same as Ky's reindeer ones)
 
 Coloring & activity books
 
 He's awake!
 
 Yum! North Pole Milk!!
 
 Ky loves his little bro!
 
 
It was totally worth the long night last night and early morning.  The kids had a blasty, I retained my title of Buddy the Elf (of our house anyway).  Kyin was so happy he wrote a note to Elfie it said "L-fe (Elfie) I <3 you" Except he wrote the heart the normal way of course :)
 
Happy December y'all!
 
Pin It